
一、本次案例
Springboot中Spring-cache与redis整合。这也是一个不错的框架,与spring的事务使用类似,只要添加一些注解方法,就可以动态的去操作缓存了,减少代码的操作。如果这些注解不满足项目的需求,我们也可以参考spring-cache的实现思想,使用AOP代理+缓存操作来管理缓存的使用。
在这个例子中我使用的是redis,当然,因为spring-cache的存在,我们可以整合多样的缓存技术,例如Ecache、Mamercache等。
二、创建springBoot 项目 king-cache
- 在pom.xml中添加以下依赖
-
<dependency>
-
<groupId>org.springframework.boot</groupId>
-
<artifactId>spring-boot-starter-cache</artifactId>
-
</dependency>
-
<dependency>
-
<groupId>org.springframework.boot</groupId>
-
<artifactId>spring-boot-starter-data-redis</artifactId>
-
</dependency>
三、redis客户端配置
无论使用spring-boot的哪个版本,我们都需要先配置redis连接,两个版本的redis客户端连接池使用有所不同。
| spring-boot版本 | 默认客户端类型 |
|---|---|
| 1.5.x | jedis |
| 2.x | lettuce |
在1.5.x中,我们配置jedis连接池只需要配置 spring.redis.pool.* 开始的配置即可,如下配置
-
spring.redis.pool.max-active=8
-
spring.redis.pool.max-wait=-1
-
spring.redis.pool.min-idle=0
-
spring.redis.pool.max-idle=8
但在2.x版本中由于引入了不同的客户端,需要指定配置哪种连接池,如下配置
在application.properties中添加如下代码:
-
#jedis客户端
-
server.port=8080
-
spring.cache.type=redis
-
spring.redis.host=192.168.140.130 # server host
-
spring.redis.password= 123456
-
spring.redis.port= 6379
-
spring.redis.jedis.pool.max-active=8
-
spring.redis.jedis.pool.max-wait=-1ms
-
spring.redis.jedis.pool.min-idle=0
-
spring.redis.jedis.pool.max-idle=8
-
#lettuce客户端
-
spring.redis.lettuce.pool.min-idle=0
-
spring.redis.lettuce.pool.max-idle=8
-
spring.redis.lettuce.pool.max-wait=-1ms
-
spring.redis.lettuce.pool.max-active=8
-
spring.redis.lettuce.shutdown-timeout=100ms
除此之外还可以看到时间配置上还需要带上对应的单位。
四、JavaConfig方式配置
通用配置方式只能满足整个程序所有缓存都采用相同公共配置的方式,如果需要特殊处理,如我们的案列,则需要自己采用代码的方式来配置。
采用代码的方式,只要需要配置的是CacheMananger,采用Redis时具体实现我们需要使用其子类RedisCacheMananger来做配置
- 创建redis的配置类RedisConfig.java
- 注意一定要在类上加上以下两个注解:
- @Configuration 可理解为用spring的时候xml里面的<beans>标签
- @EnableCaching 注解是spring framework中的注解驱动的缓存管理功能。
-
package com.answer.config;
-
-
import java.lang.reflect.Method;
-
import java.time.Duration;
-
import java.util.HashMap;
-
import java.util.Map;
-
-
import org.springframework.cache.CacheManager;
-
import org.springframework.cache.annotation.CachingConfigurerSupport;
-
import org.springframework.cache.annotation.EnableCaching;
-
import org.springframework.cache.interceptor.KeyGenerator;
-
import org.springframework.context.annotation.Bean;
-
import org.springframework.context.annotation.Configuration;
-
import org.springframework.data.redis.cache.RedisCacheConfiguration;
-
import org.springframework.data.redis.cache.RedisCacheManager;
-
import org.springframework.data.redis.cache.RedisCacheWriter;
-
import org.springframework.data.redis.connection.RedisConnectionFactory;
-
import org.springframework.data.redis.core.RedisTemplate;
-
import org.springframework.data.redis.core.StringRedisTemplate;
-
import org.springframework.data.redis.serializer.Jackson2JsonRedisSerializer;
-
-
import com.fasterxml.jackson.annotation.JsonAutoDetect;
-
import com.fasterxml.jackson.annotation.PropertyAccessor;
-
import com.fasterxml.jackson.databind.ObjectMapper;
-
-
/**
-
* <p>redis缓存配置</p>
-
* Created by zhezhiyong@163.com on 2017/9/21.
-
*/
-
@Configuration
-
@EnableCaching
-
public class RedisConfig extends CachingConfigurerSupport {
-
-
@Bean
-
public KeyGenerator KeyGenerator() {
-
return new KeyGenerator() {
-
@Override
-
public Object generate(Object target, Method method, Object… params) {
-
StringBuilder sb = new StringBuilder();
-
sb.append(target.getClass().getName());
-
sb.append(method.getName());
-
for (Object obj : params) {
-
sb.append(obj.toString());
-
}
-
return sb.toString();
-
}
-
};
-
}
-
-
/* @Bean
-
public CacheManager cacheManager(RedisTemplate redisTemplate) {
-
RedisCacheManager manager = new RedisCacheManager(redisTemplate);
-
manager.setUsePrefix(true);
-
RedisCachePrefix cachePrefix = new RedisPrefix(“prefix”);
-
manager.setCachePrefix(cachePrefix);
-
// 整体缓存过期时间
-
manager.setDefaultExpiration(3600L);
-
// 设置缓存过期时间。key和缓存过期时间,单位秒
-
Map<String, Long> expiresMap = new HashMap<>();
-
expiresMap.put(“user”, 1000L);
-
manager.setExpires(expiresMap);
-
return manager;
-
}*/
-
-
@Bean
-
CacheManager cacheManager(RedisConnectionFactory connectionFactory) {
-
//初始化一个RedisCacheWriter
-
RedisCacheWriter redisCacheWriter = RedisCacheWriter.nonLockingRedisCacheWriter(connectionFactory);
-
//设置CacheManager的值序列化方式为JdkSerializationRedisSerializer,但其实RedisCacheConfiguration默认就是使用StringRedisSerializer序列化key,JdkSerializationRedisSerializer序列化value,所以以下注释代码为默认实现
-
//ClassLoader loader = this.getClass().getClassLoader();
-
//JdkSerializationRedisSerializer jdkSerializer = new JdkSerializationRedisSerializer(loader);
-
//RedisSerializationContext.SerializationPair<Object> pair = RedisSerializationContext.SerializationPair.fromSerializer(jdkSerializer);
-
//RedisCacheConfiguration defaultCacheConfig=RedisCacheConfiguration.defaultCacheConfig().serializeValuesWith(pair);
-
RedisCacheConfiguration defaultCacheConfig = RedisCacheConfiguration.defaultCacheConfig();
-
//设置默认超过期时间是30秒
-
defaultCacheConfig.entryTtl(Duration.ofSeconds(30));
-
//初始化RedisCacheManager
-
RedisCacheManager cacheManager = new RedisCacheManager(redisCacheWriter, defaultCacheConfig);
-
return cacheManager;
-
}
-
@Bean
-
public RedisTemplate<String, String> redisTemplate(RedisConnectionFactory factory) {
-
StringRedisTemplate template = new StringRedisTemplate(factory);
-
Jackson2JsonRedisSerializer jackson2JsonRedisSerializer = new Jackson2JsonRedisSerializer(Object.class);
-
ObjectMapper om = new ObjectMapper();
-
om.setVisibility(PropertyAccessor.ALL, JsonAutoDetect.Visibility.ANY);
-
om.enableDefaultTyping(ObjectMapper.DefaultTyping.NON_FINAL);
-
jackson2JsonRedisSerializer.setObjectMapper(om);
-
template.setValueSerializer(jackson2JsonRedisSerializer);
-
template.afterPropertiesSet();
-
return template;
-
}
-
}
以上代码中RedisCacheConfiguration类为2.x新增的配置类,增加了几个配置项。这里比较奇怪的是调用它的配置方法每一次都会重新生成一个配置对象,而不是在原对象上直接修改参数值,这一点本人没搞懂作者为何要选择这种方式。
到这里基本的配置就已经完成了
五、具体使用
如果我们想在其他项目中添加该微服务想进行缓存的操作,需依赖king-cache模块:
-
<!– redis-cache 工具类 –>
-
<dependency>
-
<groupId>com.answer</groupId>
-
<artifactId>king-cache</artifactId>
-
<version>0.0.1-SNAPSHOT</version>
-
</dependency>
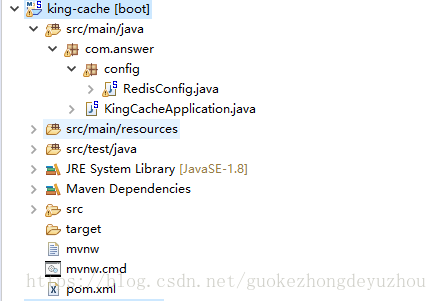
六、测试Demo——新建项目:king-cache-1
![图片[2]-Springboot 2.X中Spring-cache与redis整合-第五维](https://img-blog.csdn.net/2018040216001885?watermark/2/text/aHR0cHM6Ly9ibG9nLmNzZG4ubmV0L2d1b2tlemhvbmdkZXl1emhvdQ==/font/5a6L5L2T/fontsize/400/fill/I0JBQkFCMA==/dissolve/70)
添加以下依赖:
-
<!– redis-cache 工具类 –>
-
<dependency>
-
<groupId>com.answer</groupId>
-
<artifactId>king-cache</artifactId>
-
<version>0.0.1-SNAPSHOT</version>
-
</dependency>
-
-
<dependency>
-
<groupId>com.google.guava</groupId>
-
<artifactId>guava</artifactId>
-
<version>19.0</version>
-
</dependency>
-
-
<dependency>
-
<groupId>org.projectlombok</groupId>
-
<artifactId>lombok</artifactId>
-
<scope>compile</scope>
-
</dependency>
依上图所示分别创建以下实例:
Info.java
-
package com.answer.entity;
-
-
import java.io.Serializable;
-
-
import lombok.AllArgsConstructor;
-
import lombok.Data;
-
-
/**
-
* <p></p>
-
* Created by zhezhiyong@163.com on 2017/9/22.
-
*/
-
@Data
-
@AllArgsConstructor
-
public class Info implements Serializable{
-
/**
-
* @Fields serialVersionUID : TODO(用一句话描述这个变量表示什么)
-
*/
-
private static final long serialVersionUID = 5457507957150215600L;
-
public Info(String string, String string2) {
-
// TODO Auto-generated constructor stub
-
}
-
public String getPhone() {
-
return phone;
-
}
-
public void setPhone(String phone) {
-
this.phone = phone;
-
}
-
public String getAddress() {
-
return address;
-
}
-
public void setAddress(String address) {
-
this.address = address;
-
}
-
private String phone;
-
private String address;
-
-
}
User.java
-
package com.answer.entity;
-
-
import java.io.Serializable;
-
-
import lombok.AllArgsConstructor;
-
import lombok.Data;
-
import lombok.NoArgsConstructor;
-
-
/**
-
* <p></p>
-
* Created by zhezhiyong@163.com on 2017/9/21.
-
*/
-
@Data
-
@AllArgsConstructor
-
@NoArgsConstructor
-
public class User implements Serializable{
-
-
-
/**
-
* @Fields serialVersionUID : TODO(用一句话描述这个变量表示什么)
-
*/
-
private static final long serialVersionUID = 1L;
-
public Long getId() {
-
return id;
-
}
-
public void setId(Long id) {
-
this.id = id;
-
}
-
public String getName() {
-
return name;
-
}
-
public void setName(String name) {
-
this.name = name;
-
}
-
public String getPassword() {
-
return password;
-
}
-
public void setPassword(String password) {
-
this.password = password;
-
}
-
private Long id;
-
private String name;
-
private String password;
-
-
}
IndexController.java
-
package com.answer.web;
-
-
import java.util.List;
-
import java.util.Map;
-
-
import org.springframework.beans.factory.annotation.Autowired;
-
import org.springframework.web.bind.annotation.GetMapping;
-
import org.springframework.web.bind.annotation.PathVariable;
-
import org.springframework.web.bind.annotation.ResponseBody;
-
import org.springframework.web.bind.annotation.RestController;
-
-
import com.answer.entity.User;
-
import com.answer.service.UserService;
-
import com.google.common.collect.ImmutableMap;
-
-
/**
-
* <p></p>
-
* Created by zhezhiyong@163.com on 2017/9/21.
-
*/
-
@RestController
-
public class IndexController {
-
-
@Autowired
-
private UserService userService;
-
-
@GetMapping(“/users”)
-
@ResponseBody
-
public List<User> users() {
-
return userService.list();
-
}
-
-
@GetMapping(“/user/{id}”)
-
@ResponseBody
-
public User findUserById(@PathVariable(“id”) Long id) {
-
return userService.findUserById(id);
-
}
-
-
@GetMapping(“/upuser/{id}”)
-
@ResponseBody
-
public User upuser(@PathVariable(“id”) Long id) {
-
return userService.upuser(id);
-
}
-
-
@GetMapping(“/info/{id}”)
-
@ResponseBody
-
public User findInfoById(@PathVariable(“id”) Long id) {
-
return userService.findInfoById(id);
-
}
-
-
@GetMapping(“/user/{id}/{name}”)
-
@ResponseBody
-
public Map update(@PathVariable(“id”) Long id, @PathVariable(“name”) String name) {
-
User user = userService.findUserById(id);
-
user.setName(name);
-
userService.update(user);
-
return ImmutableMap.of(“ret”, 0, “msg”, “ok”);
-
}
-
-
-
}
UserService.java
-
package com.answer.service;
-
-
import java.util.List;
-
-
import com.answer.entity.User;
-
-
/**
-
* <p></p>
-
* Created by zhezhiyong@163.com on 2017/9/21.
-
*/
-
public interface UserService {
-
-
List<User> list();
-
-
User findUserById(Long id);
-
-
User findInfoById(Long id);
-
-
void update(User user);
-
-
void remove(Long id);
-
-
User upuser(Long id);
-
-
}
UserServiceImpl.java
-
package com.answer.service.impl;
-
import java.util.Arrays;
-
import java.util.HashMap;
-
import java.util.List;
-
import java.util.Map;
-
-
import org.springframework.cache.annotation.CacheEvict;
-
import org.springframework.cache.annotation.CachePut;
-
import org.springframework.cache.annotation.Cacheable;
-
import org.springframework.stereotype.Service;
-
-
import com.answer.entity.Info;
-
import com.answer.entity.User;
-
import com.answer.service.UserService;
-
-
import lombok.extern.slf4j.Slf4j;
-
-
/**
-
* <p></p>
-
* Created by zhezhiyong@163.com on 2017/9/21.
-
*/
-
@Service
-
@Slf4j
-
public class UserServiceImpl implements UserService {
-
-
private Map<Long, User> userMap = new HashMap<>();
-
private Map<Long, Info> infoMap = new HashMap<>();
-
-
public UserServiceImpl() {
-
User u1=new User();
-
u1.setId(1L);
-
u1.setName(“1111”);
-
u1.setPassword(“11223434”);
-
User u2=new User();
-
u2.setId(1L);
-
u2.setName(“1111”);
-
u2.setPassword(“11223434”);
-
User u3=new User();
-
u3.setId(1L);
-
u3.setName(“1111”);
-
u3.setPassword(“11223434”);
-
-
userMap.put(1L,u1);
-
userMap.put(2L,u2);
-
userMap.put(3L,u3);
-
infoMap.put(1L, new Info(“18559198715”, “福州市”));
-
}
-
-
@Override
-
public List list() {
-
return Arrays.asList(userMap.values().toArray());
-
}
-
-
@Override
-
@Cacheable(value = “user”, key = “‘user’.concat(#id.toString())”)
-
public User findUserById(Long id) {
-
//log.info(“findUserById query from db, id: {}”, id);
-
System.out.println(“findUserById query from db, id: {}======”+id);
-
return userMap.get(id);
-
}
-
-
@Override
-
@Cacheable(value = “info”, key = “‘info’.concat(#id.toString())”)
-
public User findInfoById(Long id) {
-
// log.info(“findInfoById query from db, id: {}”, id);
-
System.out.println(“findUserById query from db, id: {}======”+id);
-
return userMap.get(id);
-
}
-
-
@Override
-
@CachePut(value = “user”, key = “‘user’.concat(#user.id.toString())”)
-
public void update(User user) {
-
//log.info(“update db, user: {}”, user.toString());
-
System.out.println(“findUserById query from db, id: {}======”);
-
userMap.put(user.getId(), user);
-
}
-
-
@Override
-
@CacheEvict(value = “user”, key = “‘user’.concat(#id.toString())”)
-
public void remove(Long id) {
-
//log.info(“remove from db, id: {}”, id);
-
System.out.println(“findUserById query from db, id: {}======”);
-
userMap.remove(id);
-
}
-
-
@Override
-
@CacheEvict(value = “user”, key = “‘user’.concat(#id.toString())”)
-
public User upuser(Long id) {
-
User d= userMap.get(id);
-
d.setName(“000000000000000000000000000000000000000000000000”);
-
return d;
-
}
-
}
注意:启动项目前一定要对king-cache进行打包(右键项目:Run As —Maven Install)
然后:king-cache-1 右键 maven —Update Project
最后:以Debug 模式启动 项目:king-cache-1
在以下方法出添加断点:
然后多次访问:http://localhost:8080/user/3
你会发现第一次进入断点,后面几次不再进入断点.
一定要添加上这个注解:@Cacheable
![图片[3]-Springboot 2.X中Spring-cache与redis整合-第五维](https://img-blog.csdn.net/20180402161021483?watermark/2/text/aHR0cHM6Ly9ibG9nLmNzZG4ubmV0L2d1b2tlemhvbmdkZXl1emhvdQ==/font/5a6L5L2T/fontsize/400/fill/I0JBQkFCMA==/dissolve/70)
项目源码下载地址: https://download.csdn.net/download/guokezhongdeyuzhou/10322780
注意以下注解的作用:
缓存的注解介绍
@Cacheable 触发缓存入口
@CacheEvict 触发移除缓存
@CacahePut 更新缓存
@Caching 将多种缓存操作分组
@CacheConfig 类级别的缓存注解,允许共享缓存名称
@CacheConfig
该注解是可以将缓存分类,它是类级别的注解方式。我们可以这么使用它。
这样的话,UseCacheRedisService的所有缓存注解例如@Cacheable的value值就都为user。
-
(cacheNames = “user”)
-
-
public class UseCacheRedisService {}
在redis的缓存中显示如下
-
127.0.0.1:6379> keys *
-
1) “user~keys“
-
2) “user_1“
-
127.0.0.1:6379> get user~keys
-
(error) WRONGTYPE Operation against a key holding the wrong kind of value
-
127.0.0.1:6379> type user~keys
-
zset
-
127.0.0.1:6379> zrange user~keys 0 10
-
1) “user_1“
我们注意到,生成的user~keys,它是一个zset类型的key,如果使用get会报WRONGTYPE Operation against a key holding the wrong kind of value。这个问题坑了我很久
@Cacheable
一般用于查询操作,根据key查询缓存.
- 如果key不存在,查询db,并将结果更新到缓存中。
- 如果key存在,直接查询缓存中的数据。
查询的例子,当第一查询的时候,redis中不存在key,会从db中查询数据,并将返回的结果插入到redis中。
-
-
public List<User> selectAllUser(){
-
return userMapper.selectAll();
-
}
调用方式。
-
@Test
-
public void selectTest(){
-
System.out.println(“===========第一次调用=======”);
-
List<User> list = useCacheRedisService.selectAllUser();
-
System.out.println(“===========第二次调用=======”);
-
List<User> list2 = useCacheRedisService.selectAllUser();
-
for (User u : list2){
-
System.out.println(“u = “ + u);
-
}
-
}
打印结果,大家也可以试一试
只输出一次sql查询的语句,说明第二次查询是从redis中查到的。
-
===========第一次调用=======
-
keyGenerator=com.lzl.redisService.UseCacheRedisService.selectAllUser.
-
keyGenerator=com.lzl.redisService.UseCacheRedisService.selectAllUser.
-
DEBUG [main] – ==> Preparing: SELECT id,name,sex,age,password,account FROM user
-
DEBUG [main] – ==> Parameters:
-
DEBUG [main] – <== Total: 1
-
===========第二次调用=======
-
keyGenerator=com.lzl.redisService.UseCacheRedisService.selectAllUser.
-
u = User{id=1, name=‘fsdfds’, sex=‘fdsfg’, age=24, password=‘gfdsg’, account=‘gfds’}
redis中的结果
我们可以看到redis中已经存在
com.lzl.redisService.UseCacheRedisService.selectAllUser.记录了。
这么长的一串字符key是根据自定义key值生成的。
-
127.0.0.1:6379> keys *
-
1) “user~keys“
-
2) “com.lzl.redisService.UseCacheRedisService.selectAllUser.”
-
3) “user_1“
-
127.0.0.1:6379> get com.lzl.redisService.UseCacheRedisService.selectAllUser.
-
“[\”java.util.ArrayList\”,[[\”com.lzl.bean.User\”,{\”id\”:1,\”name\”:\”fsdfds\”,\”sex\”:\”fdsfg\”,\”age\”:24,\”password\”:\”gfdsg\”,\”account\”:\”gfds\”}]]]“
@CachePut
一般用于更新和插入操作,每次都会请求db
通过key去redis中进行操作。
1. 如果key存在,更新内容
2. 如果key不存在,插入内容。
-
/**
-
* 单个user对象的插入操作,使用user+id
-
* @param user
-
* @return
-
*/
-
(key = “\”user_\” + #user.id”)
-
public User saveUser(User user){
-
userMapper.insert(user);
-
return user;
-
}
redis中的结果
多了一条记录user_2
-
127.0.0.1:6379> keys *
-
1) “user~keys”
-
2) “user_2”
-
3) “com.lzl.redisService.UseCacheRedisService.selectAllUser.”
-
4) “user_1”
-
127.0.0.1:6379> get user_2
-
“[\”com.lzl.bean.User\“,{\”id\“:2,\”name\“:\”fsdfds\“,\”sex\“:\”fdsfg\“,\”age\“:24,\”password\“:\”gfdsg\“,\”account\“:\”gfds\“}]“
@CacheEvict
根据key删除缓存中的数据。allEntries=true表示删除缓存中的所有数据。
-
(key = “\”user_\” + #id”)
-
public void deleteById(Integer id){
-
userMapper.deleteByPrimaryKey(id);
-
}
测试方法
-
-
public void deleteTest(){
-
useCacheRedisService.deleteById(1);
-
}
redis中的结果
user_1已经移除掉。
-
127.0.0.1:6379> keys *
-
1) “user~keys“
-
2) “user_2“
-
3) “com.lzl.redisService.UseCacheRedisService.selectAllUser.”
测试allEntries=true时的情形。
-
-
public void deleteAllTest(){
-
useCacheRedisService.deleteAll();
-
}
-
(allEntries = true)
-
public void deleteAll(){
-
userMapper.deleteAll();
-
}
redis中的结果
redis中的数据已经全部清空
-
127.0.0.1:6379> keys *
-
(empty list or set)
@Caching
通过注解的属性值可以看出来,这个注解将其他注解方式融合在一起了,我们可以根据需求来自定义注解,并将前面三个注解应用在一起
-
public @interface Caching {
-
Cacheable[] cacheable() default {};
-
-
CachePut[] put() default {};
-
-
CacheEvict[] evict() default {};
-
}
使用例子如下
-
(
-
put = {
-
(value = “user”, key = “\”user_\” + #user.id”),
-
(value = “user”, key = “#user.name”),
-
(value = “user”, key = “#user.account”)
-
}
-
)
-
public User saveUserByCaching(User user){
-
userMapper.insert(user);
-
return user;
-
}
-
-
public void saveUserByCachingTest(){
-
User user = new User();
-
user.setName(“dkjd”);
-
user.setAccount(“dsjkf”);
-
useCacheRedisService.saveUserByCaching(user);
-
}
redis中的执行结果
一次添加三个key
-
keys *
-
1) “user~keys”
-
2) “dsjkf”
-
3) “dkjd”
-
4) “user_3”